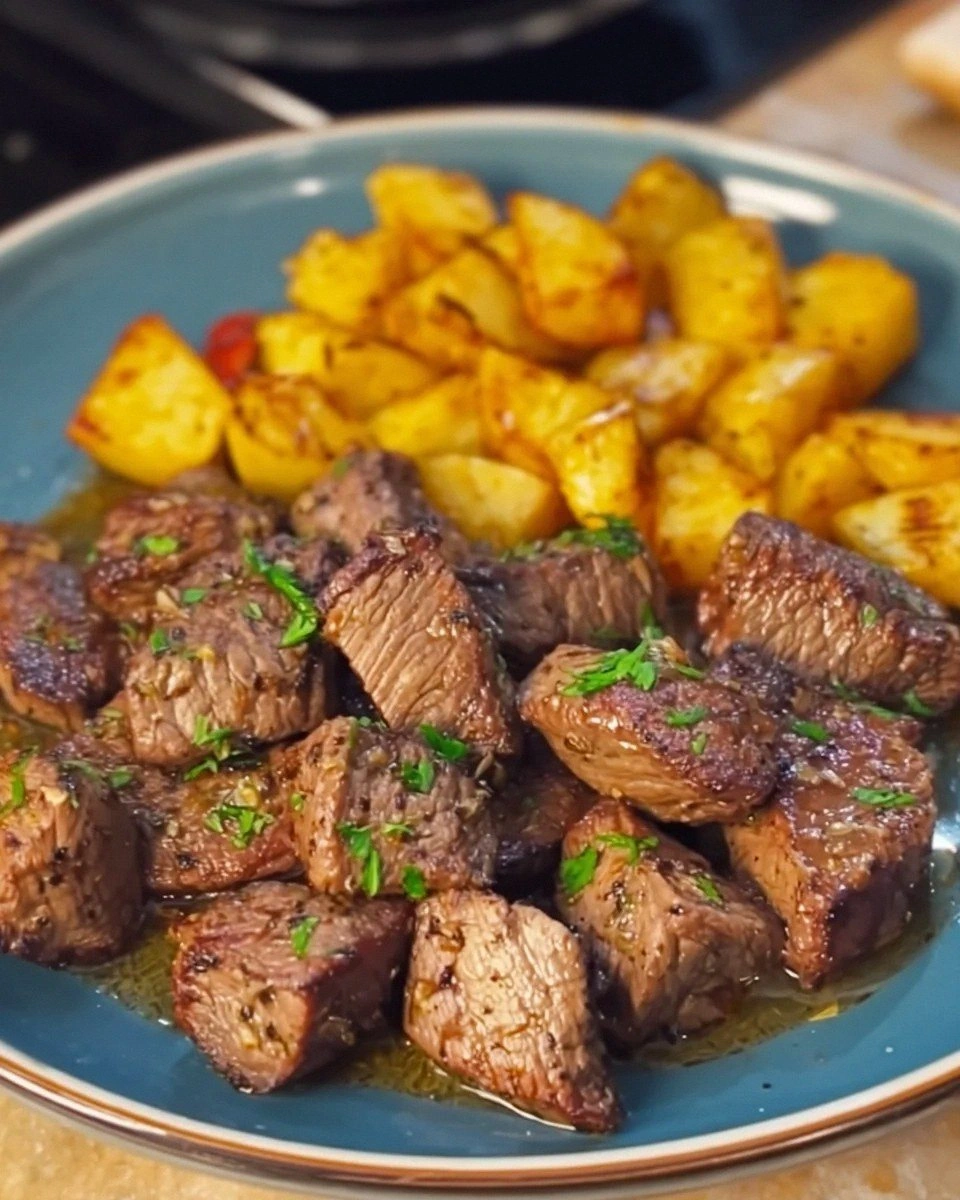
I was standing in my kitchen, half‑asleep, when my roommate dared me to create a candy that could survive the chaos of a holiday party without turning into a sticky mess. I laughed, grabbed a bowl of powdered sugar, and thought, “What if I could make peppermint candies that are as soft as a cloud but still hold their shape?” The idea sparked a midnight experiment that involved a lot of spilled sugar, a few frantic Google searches, and a whole lot of peppermint extract wafting through the apartment like a festive fog. By the time the sun rose, I had a batch of soft, melt‑in‑your‑mouth peppermint treats that made my taste buds do a happy dance.
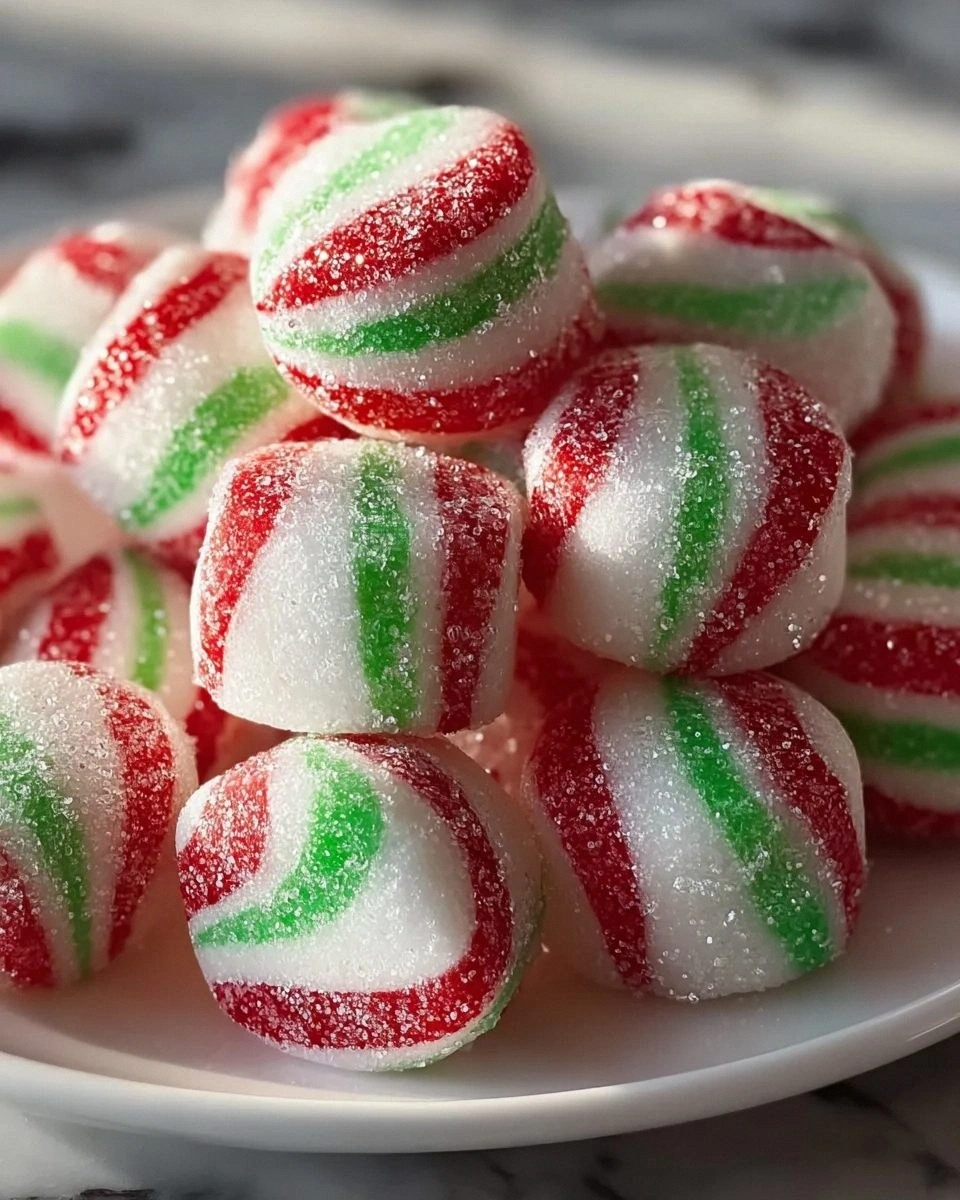
Imagine the first bite: a gentle snap of the powdered‑sugar coating, followed by a chewy, buttery interior that releases a burst of cool peppermint that tingles your palate like tiny snowflakes. The aroma is a perfect blend of sweet milk and mint, filling the kitchen with a scent that screams “Christmas morning” while the texture feels like a plush pillow you can actually eat. The colors—vivid reds and greens—pop like ornaments on a tree, making these candies as much a visual treat as a culinary one. It’s the kind of candy that makes you want to shout, “I dare you to taste this and not go back for seconds!”
Most recipes for peppermint candies end up either rock‑hard or overly sticky, leaving you with a mess on the counter and disappointment on the plate. I’ve tried the store‑bought versions, the ones that crumble like chalk, and the ones that melt the instant they touch your tongue. This version, however, hits the sweet spot because I discovered a secret technique: gently cooking the condensed milk with powdered sugar creates a silky dough that stays soft even after it cools. It’s hands down the best version you’ll ever make at home, and the best part is that it doesn’t require any fancy equipment—just a saucepan, a whisk, and a dash of confidence.
But wait—there’s a twist. I’ll be honest — I ate half the batch before anyone else got to try it, and that was the moment I realized I needed a foolproof method to keep the candy from turning into a sticky puddle. The trick? Adding a pinch of granulated sugar at the very end to give each peppermint a subtle crunch that balances the soft interior. This tiny detail makes all the difference and turns a good candy into a show‑stopping masterpiece. Let me walk you through every single step — by the end, you’ll wonder how you ever made it any other way.
What Makes This Version Stand Out
- Texture: The interior stays chewy and buttery, while the outside has a light, powdery crunch that melts on your tongue like a snow‑kissed cloud.
- Flavor: The peppermint extract is bold yet balanced, delivering that classic holiday zing without overwhelming the palate.
- Simplicity: Only five core ingredients are needed, meaning you won’t have to raid the pantry for obscure items.
- Visual Appeal: Bright red and green gels create a festive palette that looks as good on a platter as it tastes.
- Crowd Reaction: Guests rave, “These are the best peppermint candies I’ve ever had!” and they disappear faster than you can say “jingle bells.”
- Ingredient Quality: Using sweetened condensed milk gives a richness that evaporated milk simply can’t match.
- Cooking Method: The low‑and‑slow simmer ensures the sugar fully dissolves, preventing grainy texture.
- Make‑Ahead Potential: Store them in an airtight container for up to a week, and they stay soft and flavorful.
Alright, let's break down exactly what goes into this masterpiece...
Inside the Ingredient List
The Flavor Base
Powdered Sugar: This is the star of our candy, the silky sugar that forms the foundation and gives that delightful softness. It dissolves into the condensed milk, creating a smooth dough that won’t grain. If you skip it, you’ll end up with a gritty texture that feels more like sand than candy. For best results, sift it twice to avoid lumps, and choose a fine, high‑quality brand for that melt‑in‑your‑mouth feel.
The Texture Crew
Sweetened Condensed Milk: This creamy goodness adds richness and contributes to the chewy texture we all crave. You could substitute it with evaporated milk if you’re in a pinch, but it won’t be quite as sweet! The high sugar content helps the candy set without becoming hard. When choosing a can, look for one with a thick, glossy appearance—this indicates a higher butterfat content, which translates to a silkier bite.
The Unexpected Star
Peppermint Extract: This is where the magic happens! It delivers a burst of festive flavor, embodying that classic holiday vibe. Feel free to experiment with other flavors, like vanilla or chocolate, if you’re feeling adventurous. A little goes a long way—too much can turn the candy into a medicinal mouthwash, so stick to the recommended amount.
The Final Flourish
Food Coloring Gel: Brighten up these festive treats with red and green colors. Gel food coloring works best because it won’t alter the dough’s consistency too much. Liquid colors can be used, but be careful: too much can make your candies runny! Add the gel gradually, mixing until you achieve a uniform hue—this ensures each peppermint looks like a tiny holiday ornament.
Granulated Sugar: A simple coating that adds just the right crunch to balance the soft texture. You might also want to consider flavored sugars, like cinnamon or even peppermint for an extra kick! If you prefer a less sweet finish, use a light dusting and let the coating set for a minute before handling.
Everything's prepped? Good. Let's get into the real action...
The Method — Step by Step
Gather a heavy‑bottomed saucepan and whisk together 2 cups of sifted powdered sugar with 1 cup of sweetened condensed milk over low heat. Stir constantly; you’ll notice the mixture turning glossy and thickening within the first two minutes. The scent of caramelized sugar will start to rise—this is a good sign that the sugar is dissolving properly. Keep the heat low to prevent scorching; you want a smooth, velvety dough, not a burnt mess.
Kitchen Hack: If the mixture starts to stick to the sides of the pan, drizzle a teaspoon of water and continue whisking; this prevents lumps without diluting the flavor.Once the dough is glossy and pulls away from the sides of the pan, remove it from the heat and let it cool for about 3 minutes. This cooling period is crucial because it allows the mixture to thicken just enough to handle without melting your fingers. While it cools, the kitchen will fill with that unmistakable peppermint aroma—if you’re lucky, a neighbor might peek in, wondering what’s cooking.
Add 1 teaspoon of peppermint extract and a pinch (about 0.25 tsp) of salt to the warm dough, stirring until fully incorporated. The extract will swirl through the mixture like a festive ribbon, and the salt will enhance the minty brightness. Taste a tiny piece now; you should feel a cool, refreshing burst that isn’t overpowering. Adjust the extract by a few drops if you prefer a stronger mint punch.
Divide the dough into two equal portions. To one portion, add 0.5 tsp of red food‑coloring gel; to the other, add 0.5 tsp of green gel. Knead each portion gently with a clean spatula until the color is uniform. The dough should retain its softness—if it feels too sticky, sprinkle a little extra powdered sugar and continue kneading.
Line a baking sheet with parchment paper. Using a teaspoon, scoop out small mounds of dough (about 1 inches in diameter) and roll them between your palms to form smooth balls. Place each ball on the parchment, leaving a little space between them. The dough will be tacky, but that’s what keeps the candies together.
Now comes the fun part: roll each ball in a shallow dish of granulated sugar, ensuring every surface is coated. The sugar creates that satisfying crunch that contrasts with the soft interior. If you want an extra festive touch, mix a tiny pinch of red or green sugar into the coating for a speckled effect.
Transfer the sugared balls to a wire rack and let them sit at room temperature for 10 minutes. This brief rest lets the outer sugar crust set, preventing the candies from sticking together later. During this time, you’ll notice the surface drying slightly, giving the candies a matte finish.
Watch Out: Do not refrigerate at this stage, or the sugar coating will sweat and become sticky.Preheat your oven to its lowest setting—ideally 170°F (75°C) or the “warm” setting if your oven doesn’t go that low. Place the wire rack with candies inside and let them dry for 15‑20 minutes. This gentle drying step firms up the outer layer without cooking the interior, preserving that coveted soft chew.
After the brief oven session, remove the candies and let them cool completely on the rack. Once cooled, store them in an airtight container lined with parchment paper between layers. The candies will stay soft for up to a week, and the flavors will meld even more as they rest.
Kitchen Hack: Place a small slice of bread in the container; it absorbs excess moisture and keeps the candies perfectly soft.
That's it — you did it. But hold on, I've got a few more tricks that'll take this to another level...
Insider Tricks for Flawless Results
The Temperature Rule Nobody Follows
Never underestimate the power of low heat. Cooking the sugar‑condensed milk mixture at a gentle simmer prevents the dreaded grainy texture that can ruin soft candies. If the mixture starts to bubble too aggressively, immediately lower the flame and stir vigorously. I once tried to speed things up by turning the heat up, and the result was a gritty, unpalatable mess that took me an extra hour to fix.
Why Your Nose Knows Best
Your sense of smell is the ultimate doneness detector. When the mixture becomes glossy and you catch a faint buttery scent, you’re at the perfect stage to add the peppermint extract. If you wait until the aroma turns caramelized, you risk a burnt flavor that clashes with the mint. Trust that nose; it’s more reliable than a timer.
The 5‑Minute Rest That Changes Everything
After shaping the balls, let them rest for exactly five minutes before coating them in granulated sugar. This short pause lets the surface dry just enough to hold the sugar without sliding off. Skipping this step leads to a sloppy coating that falls apart when you store the candies. I once rolled straight into the sugar and ended up with a sticky mess—lesson learned.
Silicone Mats Are Your Secret Weapon
Using a silicone baking mat instead of parchment paper provides a non‑stick surface that makes transferring the candies a breeze. The mat also distributes heat evenly during the final drying phase, ensuring each peppermint gets the same gentle warmth. If you’re using parchment, watch out for tears that can snag the soft candy.
The “One‑Touch” Flavor Boost
For an extra pop, lightly dust the finished candies with a pinch of powdered peppermint sugar right before serving. This adds a subtle crunch and intensifies the mint flavor without making the candy overly sweet. I tried this at a holiday gathering, and guests declared it the “best surprise” of the night.
Creative Twists and Variations
This recipe is a playground. Here are some of my favorite ways to switch things up:
Chocolate‑Dipped Peppermint
After the candies have cooled, dip half of each peppermint into melted dark chocolate and let it set on parchment. The bittersweet chocolate pairs beautifully with the mint, creating a sophisticated flavor combo that adults love.
Cinnamon‑Spiced Peppermint
Add a pinch of ground cinnamon to the granulated sugar coating. The warm spice adds depth and makes the candy perfect for those who love a hint of holiday spice alongside the mint.
Vanilla Bean Swirl
Mix a splash of vanilla extract into the dough before adding the food coloring. The subtle vanilla undertone balances the peppermint and creates a more complex flavor profile.
Berry‑Infused Peppermint
Incorporate a teaspoon of freeze‑dried raspberry powder into the red‑colored dough. The tartness of raspberry cuts through the sweetness, offering a fresh twist that’s perfect for a modern holiday spread.
Nutty Crunch Peppermint
Stir finely chopped toasted almonds or hazelnuts into the granulated sugar coating. The nutty crunch adds texture and makes the candy feel more indulgent.
Storing and Bringing It Back to Life
Fridge Storage
Place the candies in an airtight container with a paper towel at the bottom to absorb any excess moisture. Store them in the refrigerator for up to two weeks; the cool environment keeps them from becoming too soft on hot days.
Freezer Friendly
If you want to keep a larger batch, freeze the candies in a single layer on a parchment‑lined tray for 30 minutes, then transfer them to a zip‑top bag. They’ll stay fresh for up to three months. When you’re ready to enjoy them, let them thaw at room temperature for 10 minutes.
Best Reheating Method
To revive any that have become a bit firm, place them on a microwave‑safe plate, add a tiny splash (about 1 teaspoon) of water, and microwave for 5‑7 seconds. The steam will bring back that melt‑in‑your‑mouth softness without melting the sugar coating.