I’ll be honest — I ate half the batch before anyone else got to try it. It started as a reckless midnight experiment when my friend dared me to turn our usual leche flan into something that could actually steal the show at a wedding. The kitchen was a battlefield of spilled ube powder, a rogue whisk that flew across the countertop, and the lingering scent of caramel that made the whole apartment feel like a bakery on fire. I was half‑laughing, half‑panicking, and fully determined to prove that a layered cake could be both a visual masterpiece and a flavor bomb.
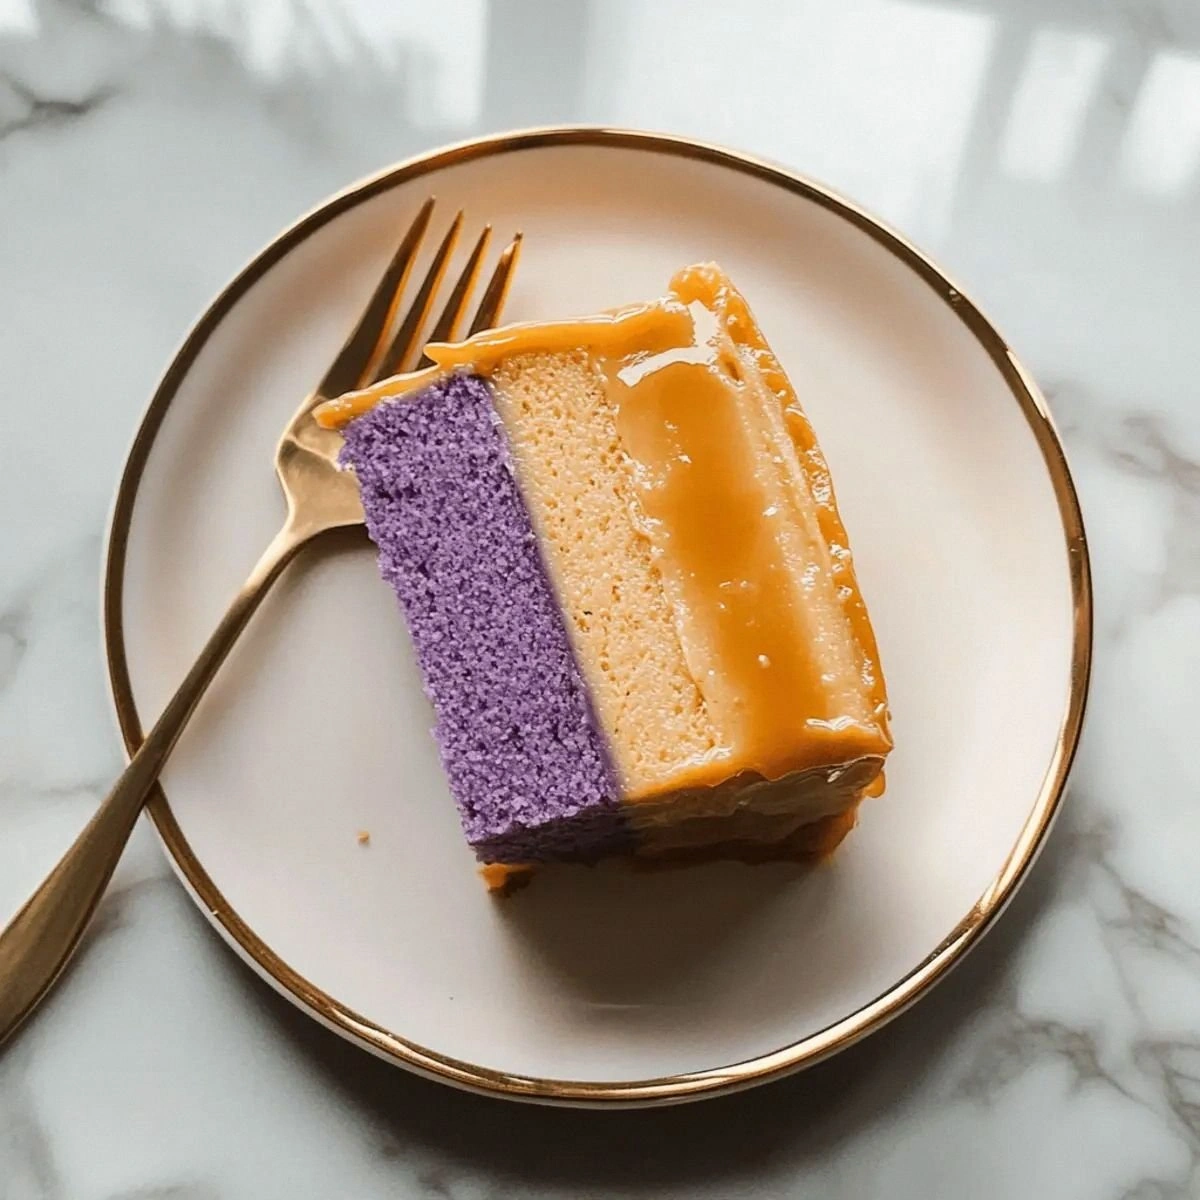
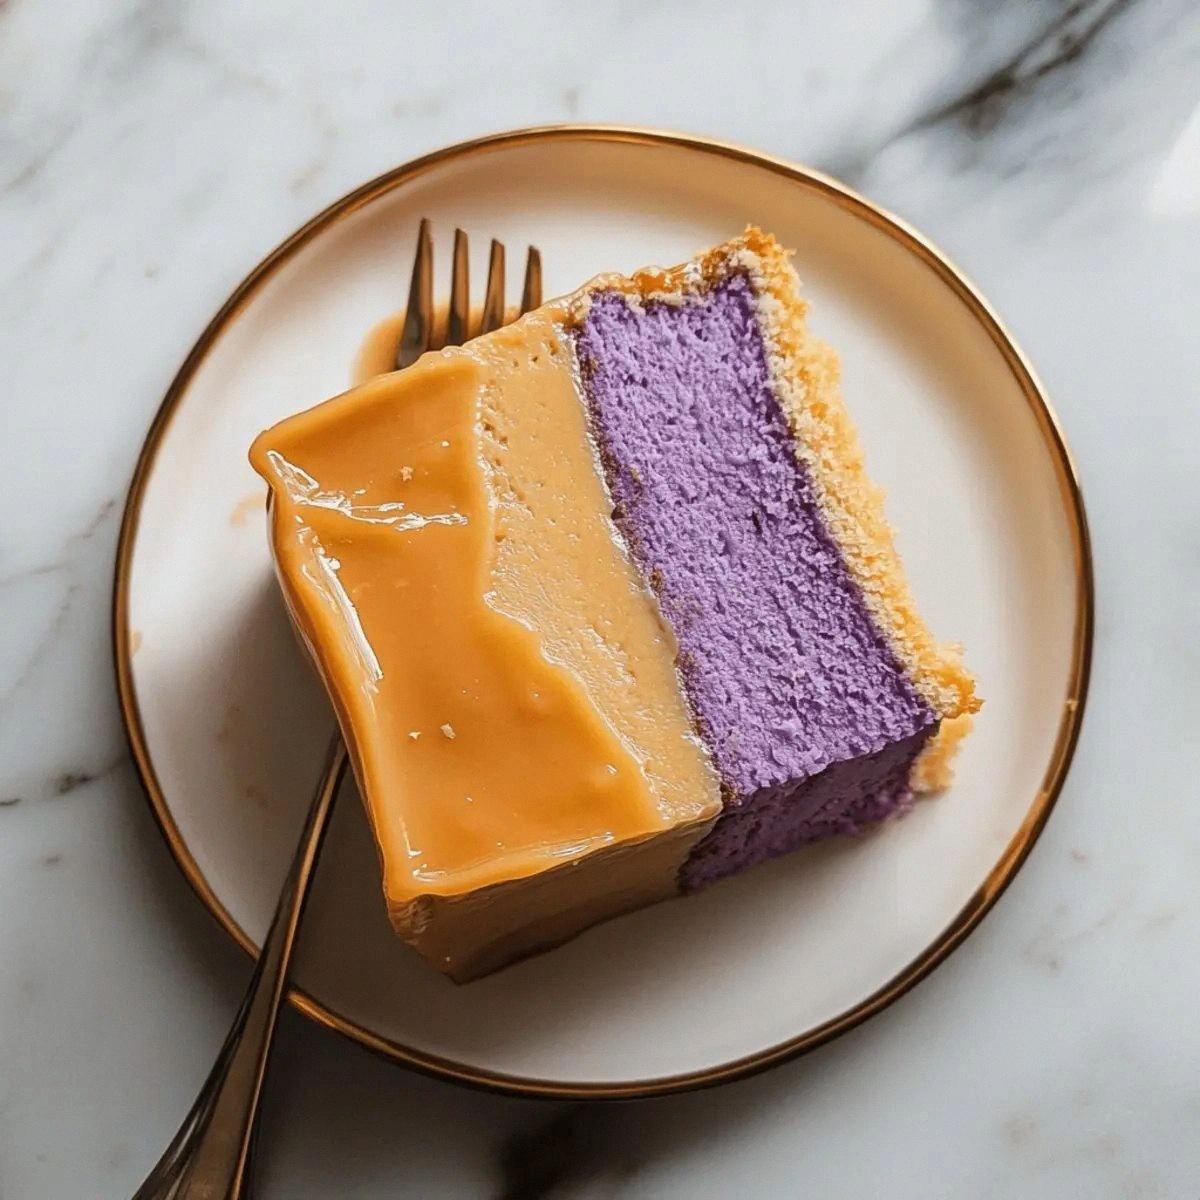
Picture this: a glossy, violet‑purple dome of ube‑infused leche flan glistening like a gemstone, sandwiched between two buttery, sponge‑soft cake layers that are as light as a cloud but sturdy enough to hold the weight of the custard. When you cut into it, the knife slides through with a satisfying sigh, releasing a cascade of silky custard that pools around the fork like liquid velvet. The aroma hits you first – a sweet, earthy perfume of roasted ube mingling with the caramelized notes of flan, all wrapped in a faint hint of vanilla that whispers “comfort” to your senses.
Most recipes get this completely wrong. They either drown the cake in too much custard, making it soggy, or they skimp on the ube, leaving you with a bland, beige flan that could pass for any ordinary dessert. This version, however, balances the sweet, the buttery, and the earthy in a way that feels like a culinary tightrope walk – and I’ve nailed it. The secret? A double‑sugar caramel base that creates a glossy glaze, and a precise layering technique that ensures each bite delivers a perfect harmony of textures.
I dare you to taste this and not go back for seconds. Okay, ready for the game‑changer? We’re about to dive into a recipe that will make you the undisputed dessert champion at any special occasion. Let me walk you through every single step — by the end, you’ll wonder how you ever made it any other way.
What Makes This Version Stand Out
- Flavor Fusion: The earthy sweetness of ube meets the caramel richness of traditional leche flan, creating a taste that feels both exotic and familiar.
- Texture Symphony: Silky custard, airy cake, and a caramel crust that cracks like thin ice – every bite is a layered experience.
- Simplicity: Despite the impressive look, the technique uses everyday tools – no fancy molds or specialty pans required.
- Uniqueness: Ube isn’t just a color; it adds a subtle nutty undertone that elevates the classic flan to a new dimension.
- Crowd Reaction: Guests often say “I’ve never seen anything like this” and then proceed to devour the entire cake.
- Ingredient Quality: Using real ube halaya and a splash of ube extract guarantees depth of flavor that powdered ube can’t match.
- Make‑Ahead Potential: Assemble the cake a day ahead; the flavors meld, and the caramel glaze becomes even shinier.
Inside the Ingredient List
The Flavor Base
The heart of this cake lies in the caramelized sugar that forms the flan’s glossy skin. ¾ cup sugar (for the flan) is melted slowly over medium heat until it turns a deep amber; this is where the magic begins. If you rush this step, you’ll end up with a bitter burnt taste, but patience rewards you with a buttery, glossy glaze that clings to the custard like a second skin. 1 can sweetened condensed milk and 1 can evaporated milk provide the creamy, dairy‑rich backbone, while the 10 large egg yolks give the custard its luxurious silkiness.
The Texture Crew
For the cake layers, 1 cup cake flour is essential – it’s lower in protein than all‑purpose flour, ensuring a tender crumb. Pair that with 1½ tsp baking powder and ¼ tsp salt to lift the batter and balance the sweetness. The ¼ cup vegetable oil replaces butter for a moist texture without adding heaviness, and the ¼ cup sugar sweetens the sponge without overwhelming the ube flavor.
The Unexpected Star
⅓ cup ube halaya brings authentic, cooked purple yam sweetness, while ½ tsp ube extract intensifies the violet hue and adds an extra layer of aroma that you can’t get from the halaya alone. The ⅓ cup water helps dissolve the sugar and creates a smooth custard base, preventing lumps. Finally, a second ¾ cup sugar (for the cake) caramelizes the top of the cake layers, giving them that subtle crackle you love.
The Final Flourish
A dash of 1 tsp vanilla extract ties everything together, smoothing the transition between the earthy ube and the caramel. The final sprinkle of ¼ cup sugar on the cake layers before baking creates a thin, caramelized crust that adds a gentle crunch to each bite. If you’re hunting for the perfect ube halaya, look for one that’s thick, glossy, and free of artificial coloring – the natural hue is part of the visual drama.
Everything's prepped? Good. Let's get into the real action...
The Method — Step by Step
- Caramel the Sugar for Flan: In a heavy‑bottomed saucepan, melt ¾ cup sugar over medium‑low heat. Stir gently with a silicone spatula; you’ll hear a faint sizzle as the crystals dissolve. When the mixture turns a deep amber and gives off a nutty aroma, immediately remove it from heat to prevent burning. Pour the caramel into a 9‑inch springform pan, swirling to coat the bottom evenly. Watch Out: If the caramel darkens too quickly, lower the heat; burnt caramel will give a bitter aftertaste that overpowers the ube.
- Blend the Flan Custard: In a large bowl, whisk 10 egg yolks until they turn a pale yellow. Gradually whisk in the 1 can sweetened condensed milk, 1 can evaporated milk, ⅓ cup water, and ½ tsp ube extract. The mixture should be smooth, with no visible streaks. Add the ⅓ cup ube halaya and continue whisking until fully incorporated. This is the moment of truth – the custard should look velvety and have a uniform lavender hue.
- Prepare the Cake Batter: In a separate bowl, whisk together 1 cup cake flour, 1½ tsp baking powder, and ¼ tsp salt. In another bowl, combine ¼ cup vegetable oil, ¼ cup sugar, and ¼ cup sugar (the second portion for the cake) until the mixture is glossy. Slowly add the dry ingredients, folding gently to avoid over‑mixing. The batter should be thick but pourable – think of a smooth pancake batter.
- First Cake Layer: Preheat the oven to 350°F (175°C). Lightly grease a 9‑inch round cake pan and line the bottom with parchment. Pour half of the batter into the pan, spreading evenly. Bake for 12‑15 minutes, or until a toothpick inserted in the center comes out clean and the top is lightly golden. Let it cool on a wire rack for 5 minutes.
- Assemble the Flan on the First Layer: Once the first cake layer is cool enough to handle, gently pour the custard mixture over it, ensuring it spreads evenly. The caramel at the bottom of the springform pan will now sit beneath the custard, creating a glossy base. Place the springform pan on a larger baking tray to catch any overflow during the water bath.
- Water Bath (Bain‑Marie): Fill the larger tray with hot water until it reaches halfway up the sides of the springform pan. This gentle, even heat prevents the custard from curdling and guarantees a silky texture. Bake at 325°F (160°C) for 35‑40 minutes. You’ll know it’s done when the edges are set but the center still has a slight wobble – that’s the hallmark of a perfect flan.
- Second Cake Layer: While the flan bakes, bake the remaining batter in the second 9‑inch pan using the same temperature and time. Once both layers are cooled, carefully remove the springform ring from the flan.
- Layer Assembly: Place the second cake layer on top of the set flan, pressing gently to ensure adhesion. The caramel will seep slightly into the top cake, giving it a subtle sheen. Refrigerate the assembled cake for at least 2 hours – this step is crucial for the custard to firm up and for the flavors to meld.
- Final Glaze and Serve: Just before serving, run a hot knife around the edge of the cake to release any trapped steam, then invert the cake onto a serving platter. Drizzle any remaining caramel from the bottom of the springform pan over the top for an extra glossy finish. Slice with a warm knife for clean cuts, and watch the custard ooze like liquid velvet onto each plate. Kitchen Hack: Warm your knife in hot water, dry it, and slice – the heat prevents the custard from sticking to the blade.
That's it — you did it. But hold on, I've got a few more tricks that'll take this to another level...
Insider Tricks for Flawless Results
The Temperature Rule Nobody Follows
Never bake flan at a temperature higher than 325°F. The lower heat ensures the custard sets uniformly without forming bubbles. I once tried 350°F to speed things up; the result was a grainy texture that felt more like a baked custard pudding than silky flan. Trust the gentle heat, and you’ll get that melt‑in‑your‑mouth consistency every time.
Why Your Nose Knows Best
When the caramel reaches that perfect amber color, your kitchen will be filled with a sweet, buttery perfume. If you can smell the caramel without it smelling burnt, you’re right on target. This sensory cue is more reliable than a timer because sugar can caramelize at different speeds depending on your pan and stove.
The 5‑Minute Rest That Changes Everything
After removing the flan from the oven, let it sit in the water bath for an additional five minutes before transferring to a cooling rack. This short rest allows the custard to finish setting gently, preventing cracks when you invert the cake. A friend tried to rush this step once — the flan split in half, and the presentation suffered.
Ube Color Boost
If you crave an even deeper violet hue, add a pinch of natural beet powder to the batter. It won’t affect the flavor, but the visual impact is dramatic. The color will stay vibrant even after refrigeration, making it perfect for photo‑worthy celebrations.
The Double‑Sift Secret
Sift your flour and baking powder twice, as mentioned earlier, but do it over a large bowl to catch any stray bits. This extra aeration creates a sponge‑like crumb that absorbs the custard without getting soggy.
Creative Twists and Variations
This recipe is a playground. Here are some of my favorite ways to switch things up:
Mango‑Infused Flan
Swap half of the ube halaya for a smooth mango puree and add a splash of mango extract. The result is a tropical sunrise that pairs beautifully with the violet layers, perfect for summer celebrations.
Chocolate Crunch
Fold in ¼ cup finely chopped dark chocolate into the cake batter and sprinkle crushed chocolate cookies on top before baking. The bittersweet crunch contrasts the sweet custard, delighting chocolate lovers.
Coconut Dream
Replace the vegetable oil with coconut oil and stir ¼ cup shredded coconut into the batter. Top the final glaze with toasted coconut flakes for a fragrant, island‑style finish.
Coffee‑Kick
Add 1 tsp instant espresso powder to the custard mixture. The subtle coffee bitterness cuts through the sweetness, creating a sophisticated flavor profile suited for brunches.
Miniature Elegance
Divide the batter and custard into 12‑oz ramekins for individual servings. This version is ideal for cocktail parties, and each mini cake can be garnished with a single edible flower for extra wow factor.
Storing and Bringing It Back to Life
Fridge Storage
Cover the cake loosely with plastic wrap and store in the refrigerator for up to 3 days. The custard will stay silky, and the cake layers retain moisture without becoming soggy.
Freezer Friendly
Wrap the entire cake in a double layer of cling film, then place it in an airtight freezer bag. It freezes beautifully for up to 1 month. Thaw overnight in the fridge, then let it sit at room temperature for 30 minutes before serving.
Best Reheating Method
To revive leftovers, place a slice on a microwave‑safe plate, sprinkle a tiny splash of water around the edges, and microwave on low for 15‑20 seconds. The steam re‑hydrates the custard, and the caramel glaze regains its shine.